Crafty Kids | Push Pin String Art
by Jennifer Cooper, posted on November 27th, 2012 in Arts & Crafts, Kids DIY
This post is brought to you in part by Kollabora. Kollabora is an online source of craft materials, community and inspiration. “We are what we make.”
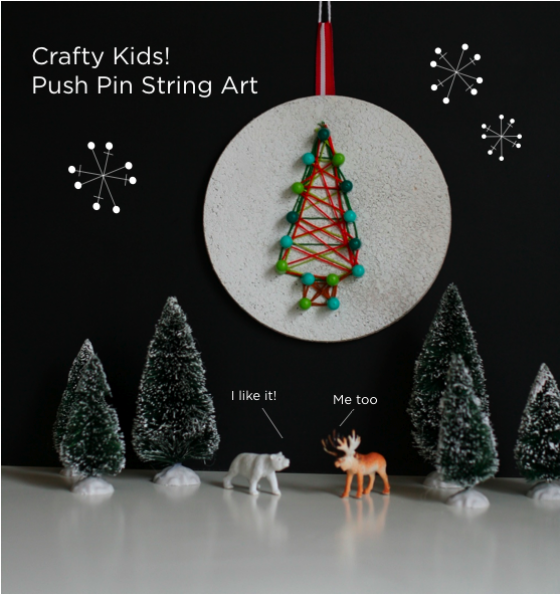
You got crafty kids? Here’s a project for just for them. It’s easy, can be done in a group or individually and once finished, can be displayed in their rooms. Nice, right?
What this craft works on beyond just being cute:
fine motor skills
planning
problem solving
I’m sure there’s more, but let’s get to it already…
You’ll need:
cork circles (these came 3 in a pack from Ikea)
embroidery floss
push pins
paint – optional
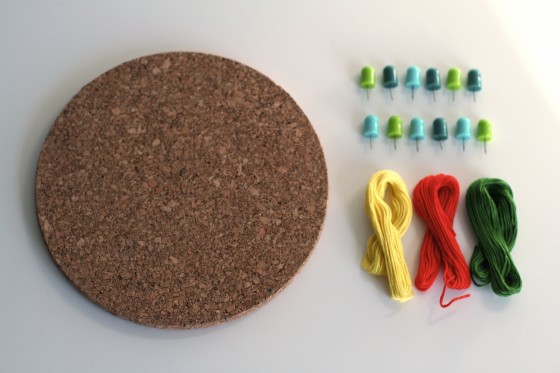
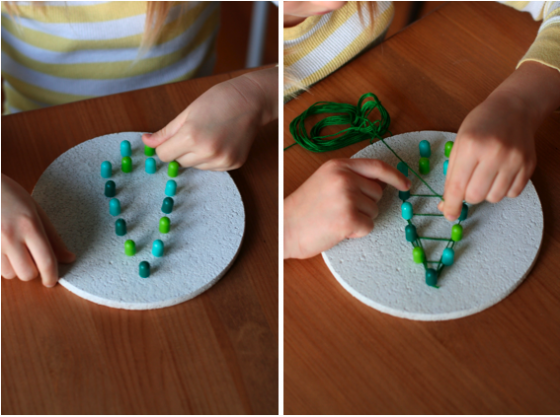
1. If you’re going to paint your corkboard, do that step first. You can also leave it natural. We just liked the way the string showed up against the white background.
2. Place push pins in a shape. We chose a Christmas tree. Do your best to make them evenly spaced. And leave a bit of the silver part showing—that’s what you’ll wrap your string around.
3. Start stringing. Wind the string several times around the first pin. Then wind the string around another push pin and keep going. You can create any number of patterns. Go for something streamlined and geometric or go wild and string with abandon.
4. Finish your string by winding it around the pushpin several times. Then push all the pins down firmly into the cork to secure.
5. If you want to hang it, take a bit of ribbon or string and attach it to the back of the corkboard using staples or hot glue. I prefer staples because you can remove them later.
We did a tree, but you can make snowflakes, stars, or forget the holidays and go for a big old circle, heart or other shape.


